Can You Grow Tomatoes From Tomato? Yes, Here Is How (2026)
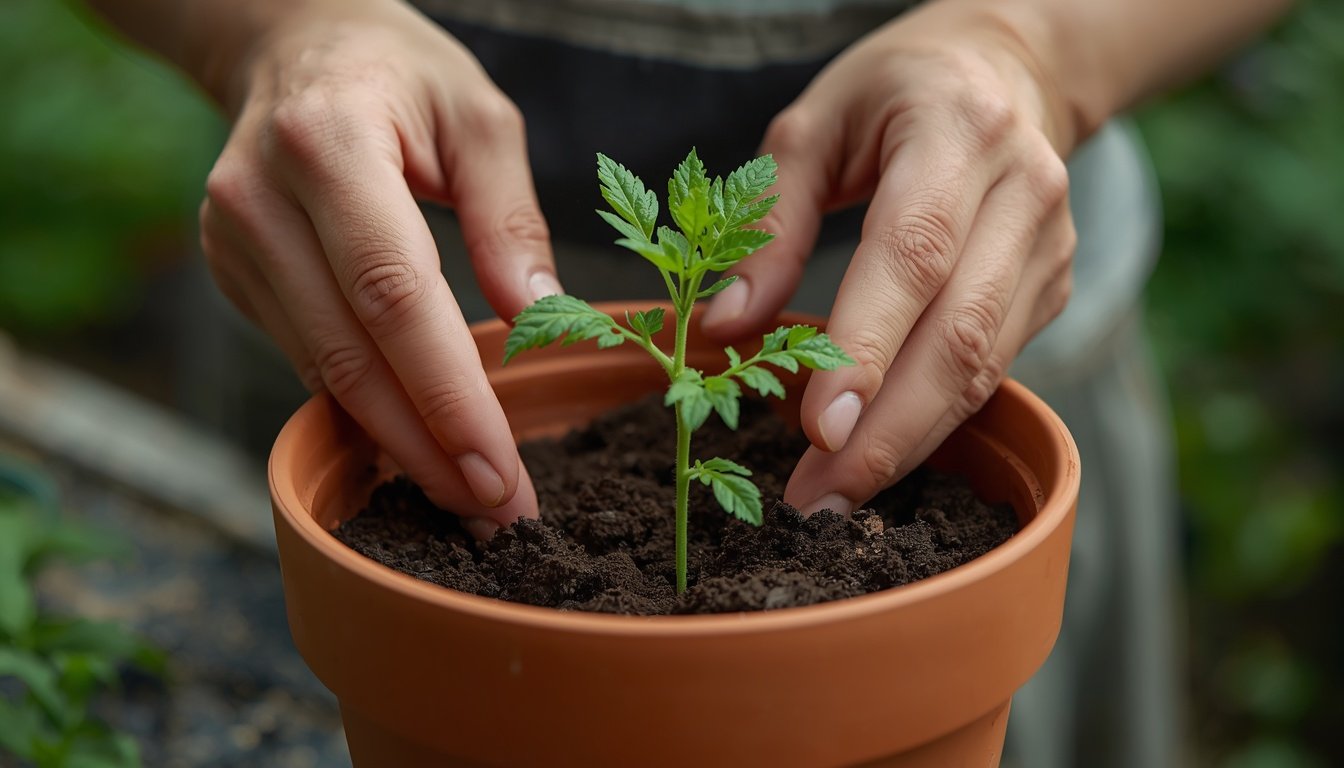
Every ripe tomato you slice open is already carrying dozens of potential new plants. You do not need a seed packet to start growing tomatoes. You need a ripe tomato, a little patience, and an understanding of what the seeds actually need to wake up. Fresh tomato seeds germinate readily once their natural coating is dealt with, and the process from kitchen tomato to established seedling is well within reach for a first-time grower.
There is a real distinction worth understanding before you start, though. Extracting seeds from a tomato and planting them separately is a different process from burying a raw tomato slice in soil, and the two methods do not perform the same way. This guide covers both, explains why one is more predictable than the other, and walks through the full journey from seed to a plant that is ready to fruit.
Quick Answer (grow tomatoes from tomato)
Quick Answer
Yes, you can grow a tomato plant directly from a tomato. The most reliable method is to scoop out the seeds, rinse off the natural gel coating, and plant them in a quality seed-starting mix. While burying a raw tomato slice also works, it is generally slower, messier, and far less predictable than planting cleaned seeds.
Can You Grow a Tomato Plant From a Tomato?
Yes. Every ripe tomato contains dozens of viable seeds, and those seeds are capable of growing into full tomato plants under the right conditions.
Inside the fruit, though, the seeds are held in a state of dormancy by a natural hormone called abscisic acid, which sits in the gel coating around each seed. That gel is what stops the seeds from sprouting while they are still surrounded by moist tomato flesh. You have probably seen what happens when that hormone breaks down early: an overripe tomato with tiny pale sprouts already growing inside it. That phenomenon is called vivipary, and it is a natural preview of exactly what you are trying to encourage on purpose.
There are three practical ways people attempt to grow tomatoes from a tomato, and they are not interchangeable:
- Extracting the seeds. You remove seeds from a ripe tomato, clean off the gel, and plant them in seed starting mix. This is the most controlled and reliable method, and it is the main method this guide focuses on.
- Planting a tomato slice. You bury a raw slice, seeds and all, directly in soil. The tomato flesh slowly breaks down around the seeds, which eventually germinate. It works, but it takes longer and is harder to predict.
- Using packaged seed. This is buying commercial seed from a known variety rather than sourcing seed from fruit at all. It is not what this guide is about, but it is worth knowing it exists as the most predictable option if matching a specific variety matters to you.
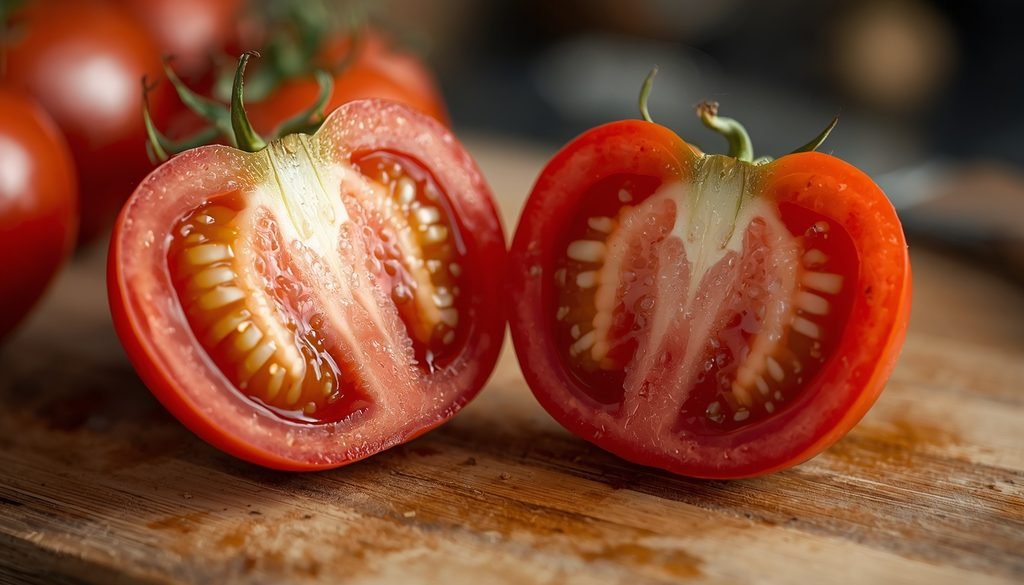
If you are new to seed saving and want a complete breakdown of the entire seed-to-harvest cycle, check out this step-by-step guide on planting tomato seeds from tomatoes. It details everything you need to know about preparing your homegrown seeds for maximum viability.
What You Need to Get Started
- A ripe, healthy tomato. Any tomato with visible seeds inside will work, including supermarket tomatoes, though see the section on hybrid varieties below for what to expect from the resulting plant.
- Small containers or a seed tray. Cell trays, yogurt cups with drainage holes, or small pots all work for starting seeds.
- Seed starting mix. A lightweight, sterile mix drains well and reduces the risk of mold and disease compared with garden soil, which can carry pathogens and compact around delicate roots.
- Water. A spray bottle or gentle watering can keeps the surface moist without displacing the seeds.
- A warm, bright location. Seeds need consistent warmth to germinate, and seedlings need strong light immediately after they emerge.
- Labels. Useful if you are starting more than one tomato variety at once, since seedlings look nearly identical at first.
Each item matters for a specific reason: containers with drainage prevent waterlogging, sterile mix reduces disease pressure, and consistent warmth and light are the two conditions tomato seeds respond to most directly.
Handling delicate seedling root balls without causing transplant shock requires gentle technique. If you want to learn proper root handling and container sizing that applies across all house and garden plants, review this general guide on how to repot a plant.
How to Grow Tomatoes From a Fresh Tomato (Step by Step)
This is the main method, and the one most likely to give you healthy, predictable results.
Step 1: Choose a Healthy Ripe Tomato
Pick a fully ripe tomato with no soft rot, mold, or off odor. A little softness is fine and even helpful, since the seeds inside a fully mature tomato are more developed. Avoid fruit that shows disease symptoms such as dark sunken spots or fuzzy mold.
💡 Why It Matters:
Seed-borne diseases can be carried into your seedlings on infected fruit.
⚠️ Common Mistake:
Using a tomato that is going bad specifically because it seems like a convenient way to use it up. Rot from disease is different from normal ripeness, and it is not worth the risk to your seedlings.
Step 2: Remove the Seeds
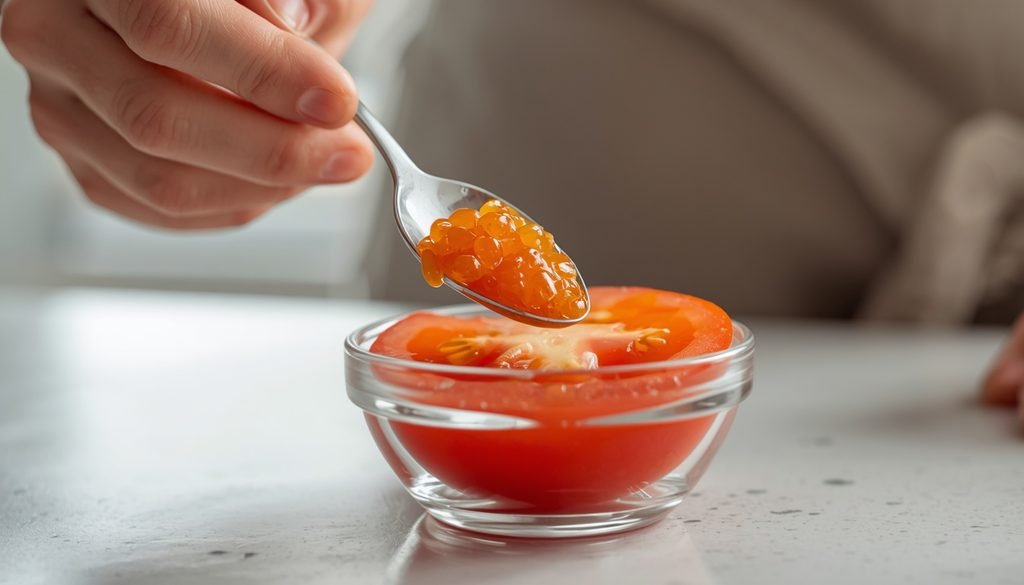
Cut the tomato in half around its equator and scoop the seeds and surrounding gel into a small container using a spoon.
💡 Why It Matters:
Working with a spoon keeps the seeds intact and separates them from the firmer flesh you do not need.
⚠️ Common Mistake:
Trying to pick seeds out one at a time from cut slices instead of scooping the seed cavities directly, which wastes time and damages seeds.
Step 3: Clean the Seeds
Add a little water to the seed and gel mixture, swirl it, and pour off the pulp and floating debris. Repeat until the seeds are reasonably clean. Viable seeds tend to sink, while empty or damaged seeds and pulp float.
💡 Why It Matters:
The gel coating contains the same germination-inhibiting compounds responsible for dormancy, and leaving too much of it on the seed can slow or unevenly delay germination.
⚠️ Common Mistake:
Skipping cleaning entirely and planting seeds still thickly coated in gel, which invites mold in the growing medium.
Step 4: Prepare the Seeds
You have two reasonable paths here, and neither is mandatory in every situation:
- Plant soon after cleaning. If you rinse the seeds well, a light rinse alone is usually enough to plant within a day or two.
- Ferment first. Fermenting the seed and pulp mixture for two to three days at room temperature more thoroughly breaks down the germination-inhibiting gel and can also reduce seed-borne pathogens. This is more relevant if you are saving seed for storage or want the most thorough cleaning, not strictly required for planting right away.
💡 Why It Matters:
Fermentation is a genuine cleaning method, not a shortcut you must take for the seeds to be viable.
⚠️ Common Mistake:
Assuming fermentation is mandatory and delaying planting unnecessarily, or over-fermenting for so long that seeds begin sprouting in the liquid.
Step 5: Prepare the Growing Medium
Fill small pots or cell trays with moistened seed starting mix, leaving a little space below the rim.
💡 Why It Matters:
Seed starting mix is lighter and better draining than garden soil, which reduces damping off risk in young seedlings.
⚠️ Common Mistake:
Using heavy garden soil or compost straight from outdoors, which can compact, retain too much water, and carry fungal spores.
Step 6: Plant the Seeds
Sow seeds about a quarter inch deep, spaced an inch or two apart if using a tray, with two or three seeds per cell as insurance against a seed that fails to sprout.
💡 Why It Matters:
Planted too deep, seeds struggle to push through to the surface before running out of stored energy; planted too shallow, they dry out too quickly.
⚠️ Common Mistake:
Burying seeds far too deep in an attempt to be thorough.
Step 7: Keep the Seeds Moist
Mist or gently water the surface so it stays consistently damp, not soggy, until germination.
💡 Why It Matters:
Seeds that dry out even briefly during germination can fail, but waterlogged mix encourages mold and rot.
⚠️ Common Mistake:
Watering heavily on a schedule instead of checking actual surface moisture.
Step 8: Provide Warmth and Light
Keep containers somewhere warm, ideally with soil temperatures in the 70 to 85°F range, since tomato seeds germinate fastest in that window and much more slowly below about 60°F. Once seedlings emerge, move them into strong light immediately, aiming for roughly 14 to 16 hours a day.
💡 Why It Matters:
Warmth drives germination speed, while light immediately after emergence prevents seedlings from stretching.
⚠️ Common Mistake:
Leaving newly emerged seedlings on a dim windowsill, which almost always produces tall, thin, weak growth.
Step 9: Thin and Strengthen the Seedlings
Once seedlings have their first true leaves, snip off the weaker ones in each cell at the soil line, leaving the strongest one or two.
💡 Why It Matters:
Crowded seedlings compete for light and airflow, which increases the risk of disease and produces weaker plants overall.
⚠️ Common Mistake:
Pulling extra seedlings out by hand, which can disturb the roots of the one you are keeping. Cutting at the soil line is gentler.
Step 10: Transplant the Seedlings
Once seedlings have several sets of true leaves and a sturdy stem, move them into a larger container or, after hardening off, out into the garden.
💡 Why It Matters:
Tomato seedlings that outgrow their starting container become root-bound and stall.
⚠️ Common Mistake:
Transplanting outdoors without a gradual adjustment period, which shocks tender seedlings raised entirely indoors.
Tomatoes produce deep taproots alongside lateral roots along their buried stems, requiring adequate depth as they mature. Understanding how deep do tomato roots grow will help you choose the right container depth and ground placement so your plants do not become root-bound.
Can You Grow Tomatoes From a Tomato Slice?
Yes, planting a raw tomato slice does work, but it is a slower and less predictable version of the same underlying process, not a separate trick.
How it works: you bury a thin slice of tomato, seeds and flesh together, in soil and keep it moist. Over the following one to four weeks, the tomato flesh gradually breaks down, which is exactly what allows the seeds’ germination inhibitors to fade the way they would in nature. As the slice decomposes, the seeds inside it germinate and push up through the soil as seedlings, often dozens from a single slice.
Why it takes longer and is less predictable: unlike cleaned seeds, the seeds in a slice are still surrounded by intact tomato tissue, so germination depends on that tissue rotting first. In a documented home experiment, seedlings from Roma and beefsteak-type slices took close to two weeks to appear, and a cherry tomato slice took nearly a month. It is also common to see visible surface mold develop in the first week or so before any seedlings show, which can look like a failure when it is actually a normal part of the process.
What can go wrong: heavy mold that spreads rather than staying contained, a slice that simply rots without producing seedlings, or very uneven timing between seeds in the same slice.
How it compares to extracting seeds: planting cleaned, extracted seeds gives you control over spacing, seed count, and timing, and it generally germinates faster and with less mold risk since there is no intact fruit tissue left to decompose first. If you want predictable results on a schedule, extract the seeds. If you are experimenting, using up a spare tomato, or simply curious, the slice method is a legitimate and fun way to do it, just with less certainty about the outcome.
Seed Preparation: Washing, Drying, and Fermentation
Should tomato seeds be washed?
Yes. Rinsing off the surrounding gel reduces the amount of germination-inhibiting residue on the seed coat and lowers the risk of mold once the seeds are in soil.
Should tomato seeds be dried before planting?
Only if you are not planting right away. Drying matters for storing seed for weeks or months, since damp seed molds in storage. If you plan to plant within a day or two of cleaning, seeds can go straight into the growing medium slightly damp.
Is fermentation necessary?
Not for planting soon after cleaning. Fermentation is a more thorough version of cleaning that also helps eliminate some seed-borne pathogens, and it is worth doing if you intend to store seed long term or want the cleanest possible result. It is not a requirement for a beginner planting seeds within the next day or two.
Can fresh tomato seeds be planted immediately?
Yes, once rinsed reasonably clean. There is no waiting period required beyond basic cleaning.
| Question | Short Answer |
|---|---|
| Wash the seeds? | Yes, rinse off the gel before planting |
| Dry the seeds first? | Only needed for storage, not for immediate planting |
| Ferment the seeds? | Optional, mainly useful for long-term seed saving |
| Plant right after cleaning? | Yes, this is the simplest beginner approach |
Germination: What to Expect
Tomato seeds generally germinate within about five to twelve days under warm, consistently moist conditions, though the exact timing depends on temperature, seed freshness, and variety. Cooler conditions slow germination considerably, and very cold soil can prevent it almost entirely.
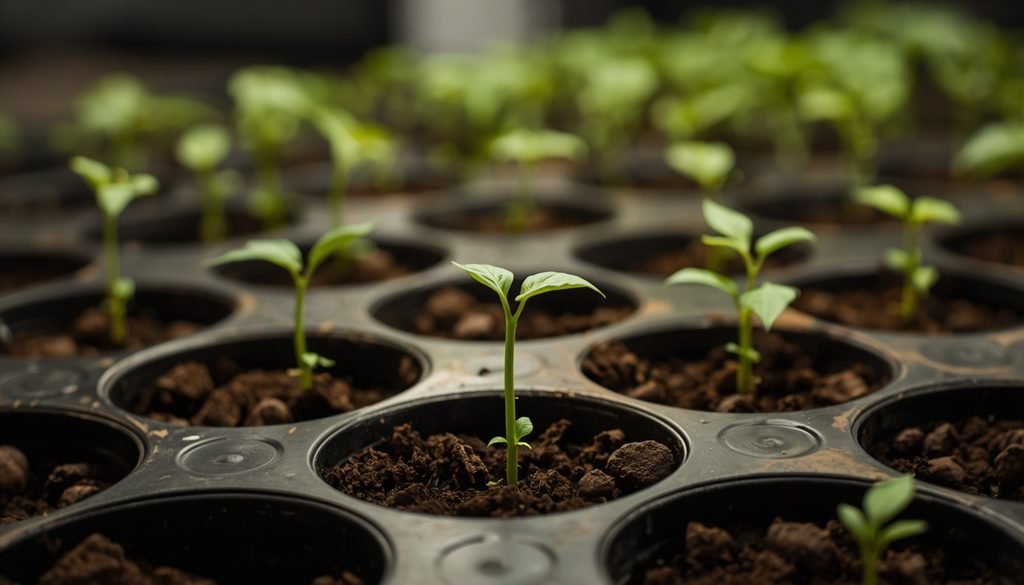
Signs of healthy germination include a small pale stem (the hypocotyl) arching up out of the soil, followed by two narrow seed leaves, called cotyledons, unfolding. True leaves, which look more like typical tomato foliage, appear roughly one to two weeks after that.
Signs of trouble include seeds that have not emerged after two to three weeks in consistently warm, moist conditions, seedlings that collapse right at the soil line shortly after emerging, or a strong smell of rot rather than plain earthy soil.
How to Care for Tomato Seedlings
Light: Give seedlings as much bright light as possible, ideally 14 to 16 hours a day from a grow light positioned just a few inches above the leaves. A sunny windowsill alone is often not strong enough, especially in winter, and tends to produce leggy seedlings that lean toward the light.
Watering: Keep the mix evenly moist without letting containers sit in standing water. Watering from below, by setting containers in a shallow tray of water and letting the mix absorb what it needs, helps keep the surface drier and reduces disease risk.
Airflow: A small fan on low, run for a short period each day, strengthens stems and helps prevent fungal problems by keeping the soil surface from staying constantly damp.
Temperature: Seedlings generally do best around 65 to 75°F during the day, with slightly cooler nights being fine.
Thinning: Keep only the strongest seedling per cell once true leaves appear, as covered in Step 9 above.
Leggy growth: Thin, pale, stretched stems usually mean insufficient light. Move seedlings closer to a grow light or add supplemental lighting rather than trying to fix it with fertilizer.
Feeding: Hold off on fertilizer until the first true leaves appear, then use a diluted, balanced liquid feed roughly every one to two weeks. Seedlings do not need feeding before that point, since the seed itself supplies early energy.
When and How to Transplant Tomato Seedlings
Readiness: Seedlings are generally ready to move up once they have two or more sets of true leaves and roots that hold the root ball together when gently removed from the cell.
Container size: Move seedlings into a container roughly three to four inches across as a first transplant, then up again as they grow.
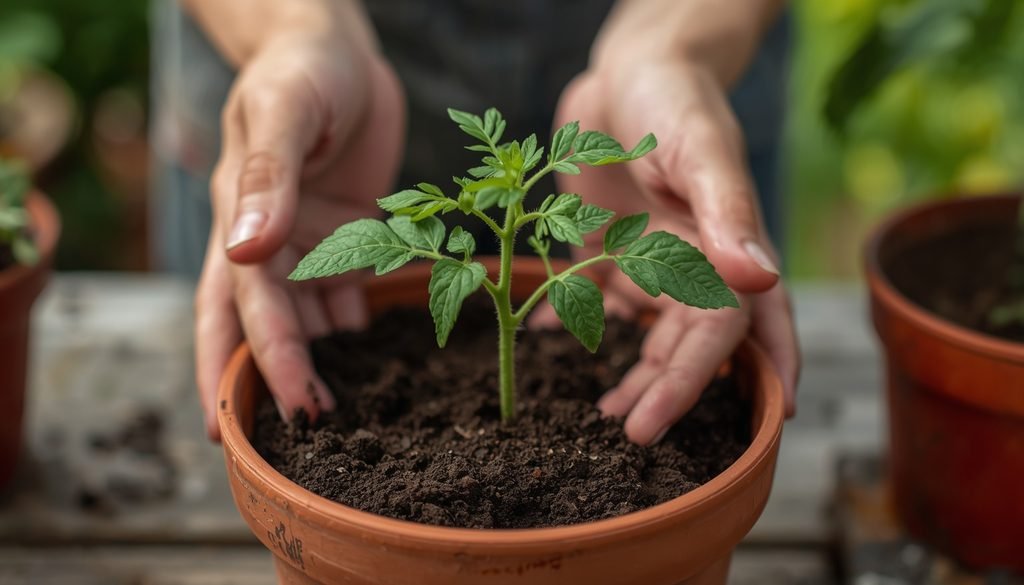
Planting depth: Tomatoes are unusual in that their stems can grow roots anywhere they touch damp soil. This means you can bury a leggy seedling deeper than you would most other vegetables, right up to the lowest set of leaves, and it will respond by growing a stronger root system along the buried stem. This tolerance is specific to tomatoes and related plants, not a general rule for seedlings.
Root handling: Handle seedlings by their leaves rather than their stems, since a damaged leaf grows back but a crushed stem does not.
Hardening off: Before moving seedlings outdoors permanently, acclimate them gradually over seven to ten days, starting with an hour or two in sheltered outdoor shade and slowly increasing sun and wind exposure.
Watering after transplanting: Water thoroughly right after transplanting to settle the soil around the roots and remove air pockets.
Sunlight: Once hardened off, tomatoes need as much direct sun as you can give them, ideally six or more hours a day.
Support: Add a stake, cage, or trellis at transplanting time rather than waiting until the plant is large, since installing support around an established root system risks damaging it.
Growing Tomatoes From Seed in Pots
Tomatoes grown from your own saved or fresh seed do well in containers, provided the container is large enough for the variety.
Container size: Small cherry or patio varieties can manage in a five-gallon container, while larger slicing and beefsteak types generally need something closer to ten gallons or more to support their root system through a full season.
Drainage: Every container needs drainage holes. Without them, water pools around the roots and encourages root rot.
Potting mix: Use a quality potting mix rather than garden soil, since containers dry out and compact differently than ground beds.
Watering: Container-grown tomatoes typically need more frequent watering than in-ground plants, sometimes daily in hot weather, since pots hold less moisture reserve.
Sunlight: Place containers where they receive at least six hours of direct sun.
Feeding: Because nutrients wash out of containers more easily than garden soil, feed potted tomatoes on a regular schedule through the growing season.
Support: Use a cage or stake sized to the container from the start, since a full-sized tomato plant in a pot still needs the same support a garden plant would.
Placement: Keep containers somewhere they will not blow over in wind once the plant is tall and fruiting, and where you can move them if a late frost threatens.
Container selection and watering routines play a massive role in whether your indoor seedlings thrive or stall. For a comprehensive walkthrough on potting sizes, soil ratios, and feeding, read our complete guide on how to grow tomatoes in pots.
How to Help Tomato Plants Grow Faster (Realistically)
There is no shortcut that makes a tomato plant mature faster than its variety allows, but healthy growth without unnecessary delays comes down to a handful of consistent factors:
- Enough direct light, both as a seedling and after transplanting
- Warm, stable temperatures rather than cold shocks
- Even soil moisture, avoiding both drought stress and waterlogging
- Adequate nutrients once true leaves appear
- Enough root space, since a cramped container slows a plant down noticeably
- Good drainage to keep roots healthy
- A transplant that avoids unnecessary root damage
- Prompt attention to early disease or pest signs
Faster is not always healthier. Pushing growth with excess fertilizer, especially high-nitrogen feed, tends to produce lush leafy growth at the expense of flowering and fruiting.
Timeline: From Tomato to Fruiting Plant
Timing varies with variety, temperature, and light, so treat the stages below as a general guide rather than a fixed schedule.
- Day 0: Extract, clean, and plant seeds (or bury a tomato slice).
- Early stage: Germination, generally within one to two weeks for extracted seeds, longer for the slice method.
- Seedling stage: First true leaves appear and growth strengthens over the following few weeks.
- Transplant stage: Seedlings move into a larger container once root-bound in their starting cell.
- Vegetative stage: The plant builds height and branching structure over several weeks.
- Flowering stage: Yellow flower clusters appear, generally once the plant has an established root system and enough light.
- Fruit stage: Fruit sets after pollination and ripens over several more weeks.
Most tomato varieties take somewhere in the range of two to three months from transplant to first ripe fruit, with considerable variation between types.
Will the Tomatoes Match the Parent Fruit?
Not always, and this matters more than most beginner guides mention.
Most tomatoes sold in supermarkets are hybrid varieties, often labeled F1. Hybrids are created by crossing two different parent plants to combine specific traits, and that combination only holds for one generation. Seeds saved from a hybrid tomato will not reliably reproduce the same fruit. The resulting plant might still produce tomatoes, but the size, flavor, disease resistance, or yield can differ noticeably from the tomato you started with.
Open-pollinated varieties, which include most heirloom tomatoes, behave differently. Seeds saved from an open-pollinated tomato generally do grow into a plant that closely resembles the parent, generation after generation.
If matching a specific known variety matters to you, growing from open-pollinated or heirloom fruit, or from a properly saved packet of that variety’s seed, is more reliable than experimenting with a random supermarket tomato. If you are simply curious what you will get, growing from a supermarket tomato is still a legitimate and often rewarding project, just one with a less predictable outcome. For readers who want the full picture on this before they start, it helps to review how open-pollinated and hybrid seeds differ before choosing which tomato to grow from.
Common Mistakes When Growing Tomatoes From a Tomato
- Planting seeds too deep. This is one of the most common reasons seeds fail to emerge, since they run out of stored energy before reaching the surface.
- Keeping the growing medium waterlogged. Constant moisture without adequate drainage invites mold and root rot.
- Providing insufficient light. This is the single biggest cause of weak, leggy seedlings.
- Overcrowding seedlings. Too many seedlings in one small container compete for light and airflow.
- Skipping drainage holes. A container without drainage traps water around the roots regardless of how carefully you water.
- Transplanting too early. Moving a seedling before it has a developed root system sets growth back.
- Exposing seedlings to harsh outdoor conditions immediately. Skipping hardening off shocks tender indoor-grown tissue.
- Overfertilizing young seedlings. Feeding before true leaves appear can burn delicate young roots.
- Using diseased fruit as a seed source. This risks carrying seed-borne disease into your new plants.
- Expecting every seedling to survive. Even under good conditions, some seeds and seedlings will not make it, which is normal and part of why starting slightly more seeds than you need is a sensible habit, a principle covered in more depth in this guide to starting plants from seed.
Troubleshooting Guide
| What You Notice | Possible Cause | What to Do |
|---|---|---|
| Seeds do not germinate | Poor conditions or low seed viability | Check moisture, warmth, and planting depth; try fresh seed if none emerge after three weeks |
| Seedlings become tall and thin | Insufficient light | Move seedlings closer to a stronger light source |
| Seedlings collapse at soil level | Possible damping off | Improve airflow, ease off watering, and avoid overcrowding |
| Leaves turn pale | Several possible causes | Check light levels, watering consistency, and whether feeding has started |
| Growth remains slow | Environmental or root-space issue | Check temperature, light, and whether the container has become too small |
| Surface mold appears | Common with the slice method or overwatering | Improve airflow and let the surface dry slightly between waterings; some surface mold is normal and not always fatal to the process |
Some of these symptoms share more than one possible cause, so it is worth checking light, water, and container conditions together rather than assuming a single culprit.
Frequently Asked Questions
Can I grow a tomato plant from a tomato?
Yes. Every ripe tomato contains viable seeds. Extracting and cleaning them before planting is the most reliable approach, though burying a slice also works and simply takes longer.
Can I grow tomatoes from a fresh tomato?
Yes, a fresh, ripe tomato is exactly what you want. Scoop out the seeds, rinse off the surrounding gel, and plant them in seed starting mix as described above.
How long does it take to grow tomatoes from a tomato plant?
From seed to first ripe fruit generally takes somewhere around two to four months, depending on variety, light, and growing conditions, with germination itself taking roughly one to two weeks.
Can I grow tomatoes from a slice of tomato?
Yes, though it is slower and less predictable than extracting the seeds first. A buried slice can take anywhere from about two to four weeks to produce visible seedlings, and some surface mold during that time is normal.
Can I plant fresh tomato seeds directly?
Yes, as long as they are reasonably rinsed clean of the surrounding gel. There is no required waiting period.
Should I dry tomato seeds before planting?
Only if you are not planting right away. Drying is important for storage, not for seeds you intend to plant within a day or two.
How deep should tomato seeds be planted?
About a quarter inch deep, covered lightly with growing medium.
How long do tomato seeds take to germinate?
Typically five to twelve days in warm, consistently moist conditions, with cooler temperatures slowing the process considerably.
Can I grow tomatoes from seeds in pots?
Yes. Start seeds in small cells or pots, then move the seedling up through progressively larger containers, finishing in a container sized to the variety, generally five gallons or more.
Will tomatoes grown from saved seeds be the same as the original tomato?
Only if the original tomato was an open-pollinated or heirloom variety. Seeds from hybrid tomatoes, which make up most supermarket fruit, will not reliably reproduce the same tomato.
Final Thoughts
Growing a tomato plant from a tomato is a genuinely achievable project for a beginner, as long as you understand what is happening at each stage. Start with healthy, disease-free fruit, clean the seeds well before planting, and give the resulting seedlings warmth, moisture, and strong light. Deciding between extracting seeds and planting a slice is really a choice between speed and control versus a slower, more hands-off experiment, and both are legitimate paths to the same result.
From there, patience matters as much as technique. Thin seedlings to the strongest ones, transplant once roots are established, harden plants off gradually before they meet full sun and wind, and keep watering consistent rather than occasional. If this is your first time starting plants from scratch, browsing PlantySolve’s other beginner plant care guides is a good next step while your seedlings grow.