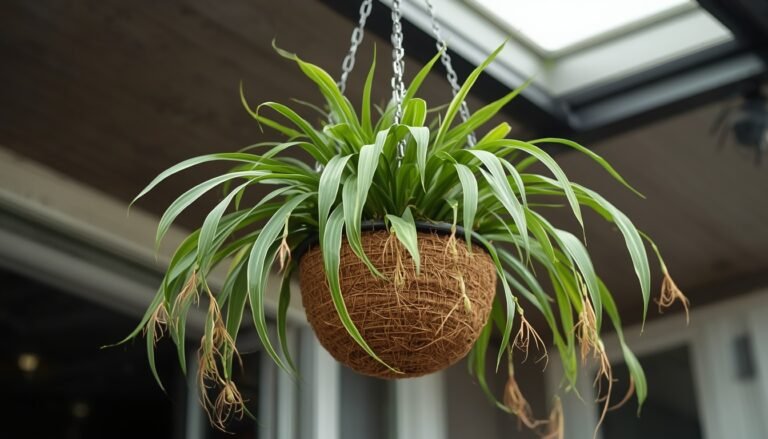
How to Care for Air Plants: Water, Light and Drying (2026)
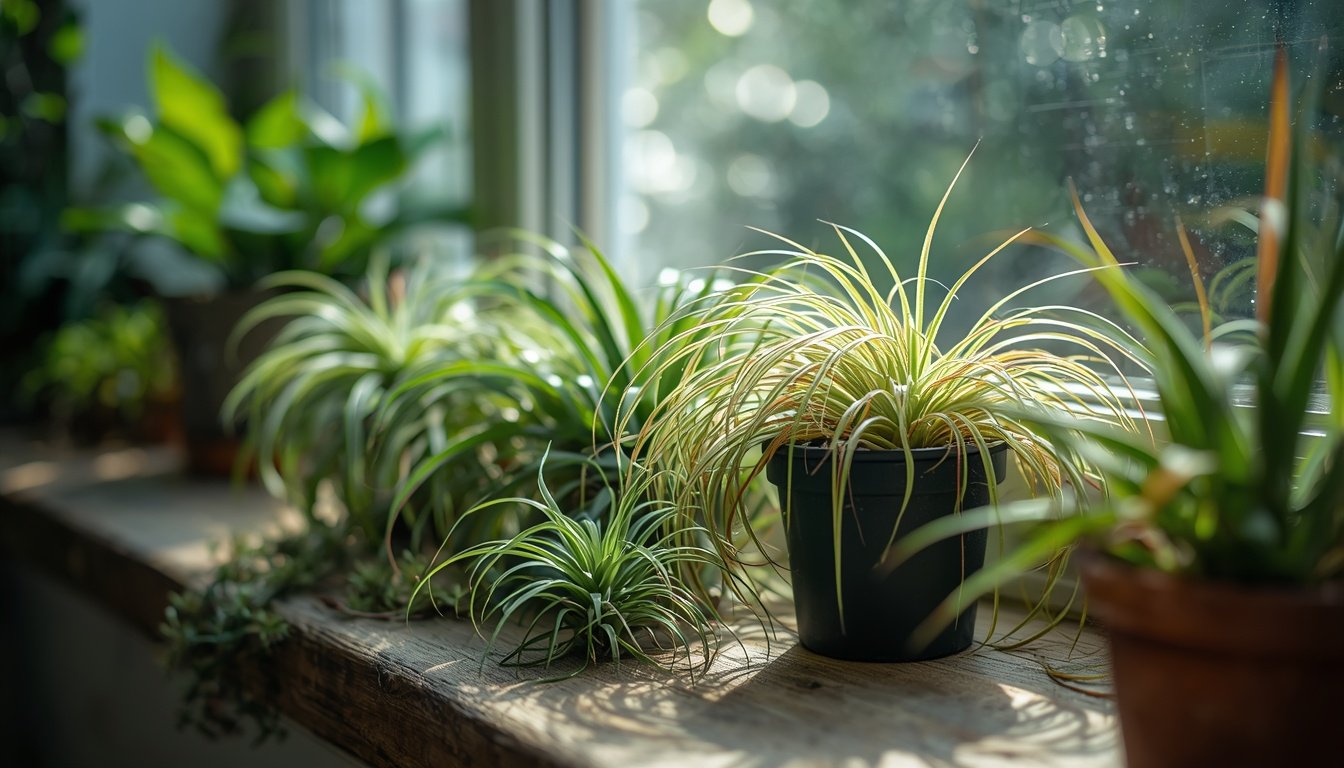
Air plants do not live on air alone. They take in water and nutrients through their leaves, so the way you water them, dry them, and place them matters far more than most beginners expect. Learning how to care for air plants comes down to three linked habits: give them bright, filtered light, soak or rinse them on a regular basis, and make sure they dry completely afterward in moving air.
This guide explains each part in plain language, including why the advice works, how to adjust it for your home, and how to tell the difference between a thirsty plant and a rotting one.
Quick Answer
Give air plants bright, filtered light, water them thoroughly once or twice a week by soaking or rinsing, then shake them out and let them dry completely within about four hours in a spot with good airflow. Keep them roughly between 50°F and 90°F and away from frost, heating vents, and sealed containers.
Give air plants bright, filtered light, water them thoroughly once or twice a week by soaking or rinsing, then shake them out and let them dry completely within about four hours in a spot with good airflow. Keep them roughly between 50 and 90 degrees Fahrenheit and away from frost, heating vents, and sealed containers.
Air Plant Problems at a Glance
| Problem | Likely Cause | What To Do |
|---|---|---|
| Brown leaf tips | Too little water, very dry air, or water quality problems | Water more thoroughly, check drying speed, and trim only the dead tip |
| Whole leaves turning brown & crispy | Long term dehydration or too much hot, direct sun | Soak for longer, move to filtered light, and remove fully dead leaves |
| Black or mushy center | Rot from water trapped in the crown | Remove rotted leaves, stop soaking, and dry the plant fully in strong airflow |
| Curled or rolled leaves | Thirst | Soak, then check whether the leaves relax over the following days |
| Pale or washed out leaves | Too much sun, or an older leaf color change | Move to filtered light and compare new growth with old growth |
| Dry, light, papery feel | Dehydration | Soak, shake, dry, and increase watering frequency gradually |
| Soft plant that feels heavy | Rot or a plant that stays wet too long | Check the base, improve airflow, and lengthen the time between waterings |
| Leaves falling off | Rot at the base, or old outer leaves dying naturally | Pull one leaf gently. If it slides out with mush at the base, treat as rot |
| No growth | Low light, infrequent watering, or normal slow growth | Improve light first, then review watering and feeding |
| Not flowering | Immaturity, low light, or normal variation between plants | Be patient, keep light and watering steady, and consider light feeding |
What Are Air Plants?
Air plants are Tillandsia, a large group of epiphytes in the bromeliad family, Bromeliaceae. Epiphytes grow on other surfaces such as tree branches, rocks, or cliffs without taking nutrients from them. The Royal Horticultural Society describes air plants as tropical epiphytes or lithophytes from Mexico and South America that anchor themselves with short, wiry roots.
The word “air plant” covers hundreds of species and many hybrids. Some are silvery and covered in fine fuzz, and others are smooth and green. This matters because they do not all tolerate the same light, dryness, or watering pattern.
Why Air Plants Do Not Need Soil
Air plants do not need soil because their roots mainly serve as anchors. The RHS notes that air plants are often tied, wired, or glued to wood, shells, or rocks for support. Soil would hold moisture against the base of the plant for long periods, which is the opposite of the fast wet and dry cycle these plants are adapted to.
That does not mean they need no care. Skipping soil simply moves the work to the leaves, which is where water and nutrients are absorbed.
How Air Plants Absorb Water
Air plants absorb water mainly through trichomes, which are tiny specialized scales on the leaf surface. The RHS explains that these water absorbing cells are the primary way Tillandsia obtain moisture from rain or fog, and that in some species they are dense enough to give a silvery, frosted look.
Penn State Extension adds a useful detail. Trichomes are modified, cup shaped scales, and the denser and fuzzier they are, the better a plant is adapted to arid conditions because it can collect more water and nutrients. In practice, this is why a fuzzy silver plant and a smooth green plant often behave differently in the same room.
Because water is taken in through the leaf surface, the plant needs to be wet across its leaves and then dry again. Constant wetness blocks that cycle and encourages rot.
Do All Air Plants Need the Same Care?
No. The basic routine is shared, but tolerance for light, dryness, and drying speed varies by species. Penn State Extension groups air plants loosely into mesic types, which come from moderately humid regions, and xeric types, which come from drier regions. Mesic types tend to have smoother, greener, slightly cupped leaves and prefer more filtered light. Xeric types tend to be silvery and fuzzy and are better adapted to dryness.
Common examples you may find for sale include:
- Tillandsia ionantha: small, compact rosettes that often blush red or pink before flowering.
- Tillandsia xerographica: large, silvery, and heavily covered in trichomes.
- Tillandsia bulbosa: a greener plant with swollen bulb like leaf bases and twisting leaves.
- Tillandsia caput medusae: a bulbous base with curling leaves.
Broad tendencies, such as silvery plants coping better with dryness, are useful guidelines. Reliable published data for exact watering schedules per species is limited, so this guide does not invent separate schedules for each plant. Watch your own plant and adjust.
How to Care for Air Plants Indoors
Indoors, air plants need bright but filtered light, a regular soak or rinse, and enough airflow to dry within a few hours. The RHS lists air, light, water, and warmth as the key requirements. Most indoor problems come from missing one of the three practical pieces: too little light, too little thorough watering, or too little drying airflow.
The sections below explain each one, starting with light.
Light Requirements
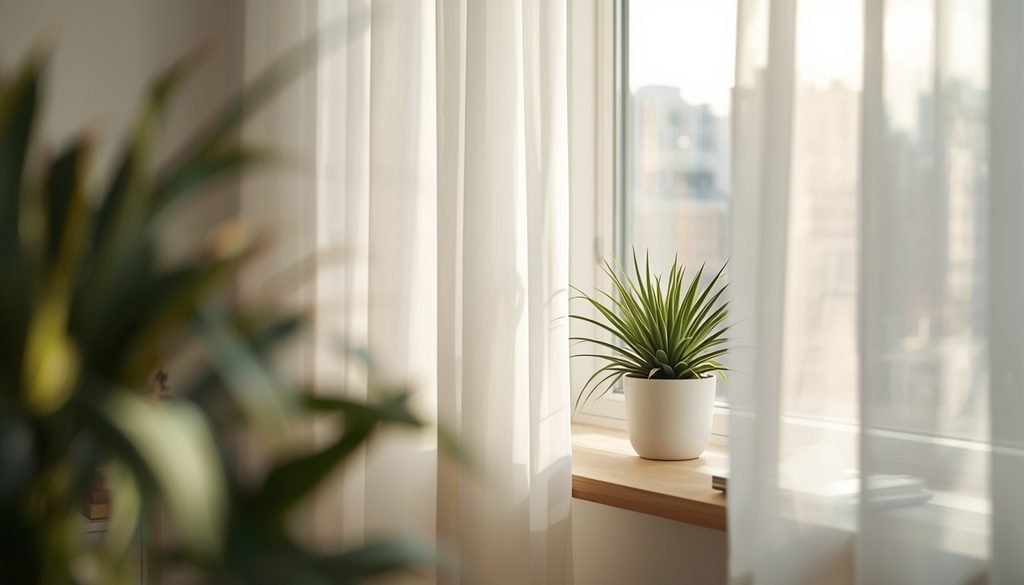
Air plants do best in bright, indirect or diffused light. The RHS recommends light shade from direct sun, especially behind glass, and gives a south facing window behind a net curtain as an ideal position in the United Kingdom. In the northern hemisphere, a bright window with a sheer curtain follows the same principle.
Why light matters. Air plants photosynthesize like other plants. Without enough light they grow slowly, lose color, and become more vulnerable to rot because they use water more slowly and stay damp longer.
Different sources give different distances. Some growers advise keeping plants within about three feet of a bright window, while a nursery care sheet suggests up to about ten feet from a bright window or skylight. The practical rule is this: the dimmer the spot, the closer to the light source the plant should sit, and the less often it should be watered.
Signs of too little light:
- Slow or no new growth
- Dull, dark green leaves that lose their normal color
- Leaves that stay wet for longer than expected
Signs of too much light:
- Bleached, pale, or straw colored patches
- Dry, brown, crispy leaf tips
- Plants that feel very light and dry within hours of watering
Direct sun. Short periods of gentle morning or evening sun may be tolerated, but hot midday sun through glass can scorch leaves and dry the plant faster than it can rehydrate. Specialist growers commonly say that more than a few hours of hot sun depletes plants of moisture.
Artificial light. A bright fluorescent or full spectrum grow light can support air plants in rooms with weak natural light. A timer helps keep the schedule steady. Because lamp strength varies widely, watch the plant’s color and growth and move it closer or farther as needed.
Seasonal changes. Winter light is weaker and days are shorter, so a plant that was comfortable a few feet from a window in summer may need to move closer in winter. In summer, the same window may deliver strong midday sun that needs a sheer curtain.
When choosing the ideal location for your indoor houseplants, always consider pet safety and check whether snake plants are toxic to cats and dogs before placing them within reach.
Best Locations for Air Plants
The best place for an air plant is near a bright window with open air around it, out of direct hot sun and away from vents. Good locations include:
- A bright shelf near an east or west facing window
- Behind a sheer curtain in a south facing window
- An open wire or wood display in a bright room
- A hanging holder with wide openings
Poor locations include:
- A dark corner or windowless room
- Directly in front of an air conditioner or heating vent
- A closed glass globe or sealed terrarium
- A cold windowsill during a frost or freezing night
Choose a spot where you can also drain and dry the plant easily. If watering is a hassle, plants tend to be neglected.
How Often to Water Air Plants
Most air plants need a thorough soak or rinse about once or twice a week, but the right frequency depends on your room. For soaking times, water quality, mounted plants, and seasonal adjustments, see our complete air plant watering guide. Clemson University’s Home and Garden Information Center advises watering once a week by misting well or by soaking for 20 to 30 minutes. Penn State Extension notes that in low household humidity, misting to the point of runoff may be needed every other day, that rinsing twice a week is a simple method, and that other growers soak weekly for 20 minutes to an hour.
That range shows why a single universal schedule does not work. Use the table below as a starting point, then adjust using the leaf feel described afterward. These starting points are general horticultural recommendations based on the sources above, not results from personal testing.
| Condition / Environment | Starting Approach |
|---|---|
| Cool, humid room with good light | Soak or rinse about once a week. Check that the plant dries in time |
| Average heated home | Soak or rinse once a week, with light misting between if leaves feel soft |
| Hot, dry room or near a heater | Rinse or soak twice a week, and mist between if leaves start to curl |
| Bright window with strong sun | Water more often, but ensure drying still finishes within a few hours |
| Dim room | Water less often, because plants dry slowly and grow slowly |
| Humid outdoor position with rain | Rain may cover most needs. Add water only in dry spells |
| Mounted plant | Mist to runoff or soak the whole mount if it tolerates water, then dry well |
How to adjust. Well hydrated leaves feel stiff and look fuller. Thirsty leaves feel softer, look duller, and curl or wrinkle. If leaves are curling, water more thoroughly or more often. If the center stays damp, or the base feels soft, water less often and improve airflow.
Common mistake: watering on a fixed calendar date regardless of season. The same plant may need very different care in an air conditioned room in July and a cool room in January.
Air Plant Watering: Quick Overview
For most beginners, use a thorough soak or rinse and then drain and dry the plant completely. Keep this care guide focused on the overall routine; the dedicated air plant watering guide covers soak vs. mist, water quality, frequency, and special cases in detail.
Soaking (recommended for loose plants):
- Fill a clean bowl with room temperature water.
- Submerge the plant fully for 20 to 30 minutes. Some sources allow up to an hour for very dry plants.
- Lift the plant out and gently shake it to remove water trapped between the leaves.
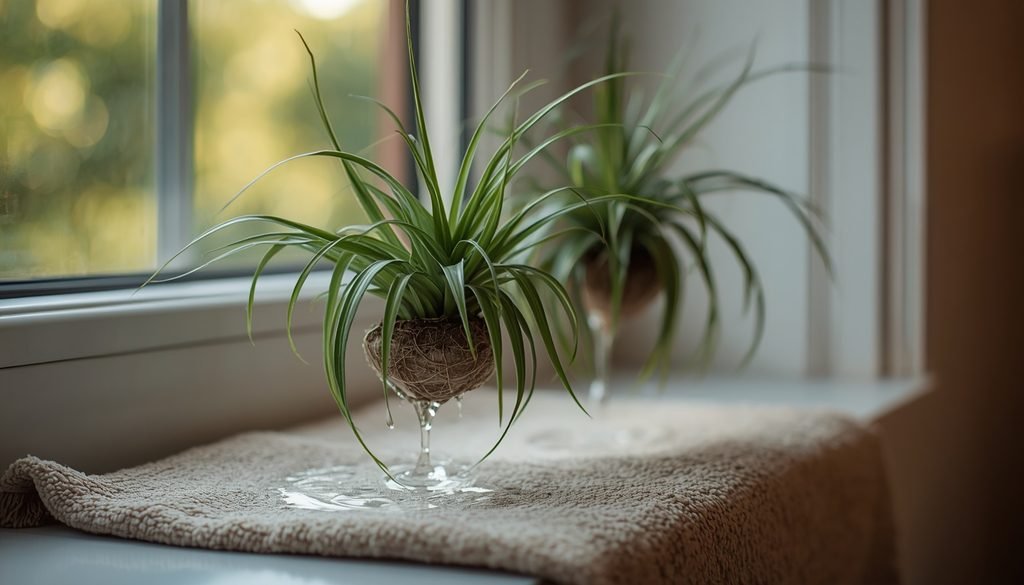
- Turn it upside down for a moment so water drains out of the center.
- Set it on a dry towel or rack in a bright, airy spot.
Timing. Watering earlier in the day gives the plant more daylight hours to dry, which is helpful in cool rooms.
Flowers. University of Vermont Extension advises watering carefully around blooms, because a wet flower can turn mushy and rot. If your plant is in bloom, keep the flower spike out of the water when soaking.
Common mistake: leaving plants sitting in a shell, dish, or vase where water collects. Plants should never stand in water after soaking.
How to Dry Air Plants After Watering
After watering, air plants should be shaken out and allowed to dry fully, ideally within about four hours. Penn State Extension advises allowing at least four hours of drying after watering before an air plant goes back into a glass terrarium. Several specialist growers give a similar guide of three to four hours.
Why drying matters. Water trapped in the central growth area of the plant, where the leaves overlap, can create conditions that encourage rot, especially in still air. Clemson advises turning plants upside down so excess water drains and the plant does not rot.
How to dry well:
- Shake the plant firmly, then invert it to drain the center.
- Place it on a towel or open rack in a bright spot with gentle moving air.
- Check the base of the leaves after a few hours. If the center still feels wet, move it into stronger airflow.
- Return it to its display only when it is fully dry.
Do not dry too fast. Air Plant City points out that a plant drying in a very short time may not have absorbed much water. If plants dry within minutes in a hot draft, soak them longer or move them out of the wind.
Common mistake: putting a wet plant straight back into a closed glass globe or a decorative shell.
What Water Is Best for Air Plants?
Rainwater or filtered water is generally the best choice, and tap water is often acceptable if your local water is not very hard or heavily treated. Cornell Cooperative Extension, drawing on Penn State and University of New Hampshire Extension, notes that air plants can be sensitive to chlorine and fluorine.
- Rainwater: The natural choice, and the RHS notes that plants outdoors benefit from rainfall. Collect it in a clean container.
- Filtered water: A basic carbon filter can reduce chlorine.
- Tap water: Often works. Letting it stand overnight allows chlorine to escape, but it does not remove chloramine, which some water suppliers use instead. Check with your supplier if plants decline for no other reason.
- Hard water: Minerals can leave white deposits on the leaves and may interfere with the trichomes over time. This is a general horticultural concern rather than a detailed finding from the extension pages cited here. If you see crusty residue, switch to rainwater or filtered water.
- Softened water: Generally not recommended, because softening usually adds sodium.
- Temperature: Use room temperature or tepid water. Very cold water can shock the plant, and hot water can damage the leaves.
Leaf distortion is not limited to indoor greens; outdoor garden crops react similarly, much like understanding why tomato leaves curl under heat stress or improper watering.
Humidity and Air Circulation
Ordinary indoor humidity is usually fine for air plants if watering and drying are done well, but airflow is not optional. The RHS states that air plants evolved in sites with superior airflow and that a well ventilated position is very important for their health. Clemson also lists good air circulation as an important factor because it helps plants dry between waterings and helps prevent disease.
Why airflow matters. Air plants take up water through their leaves, so any moisture that stays in the crown is available for fungal and bacterial problems. Moving air removes it. Stagnant, humid air keeps it there.
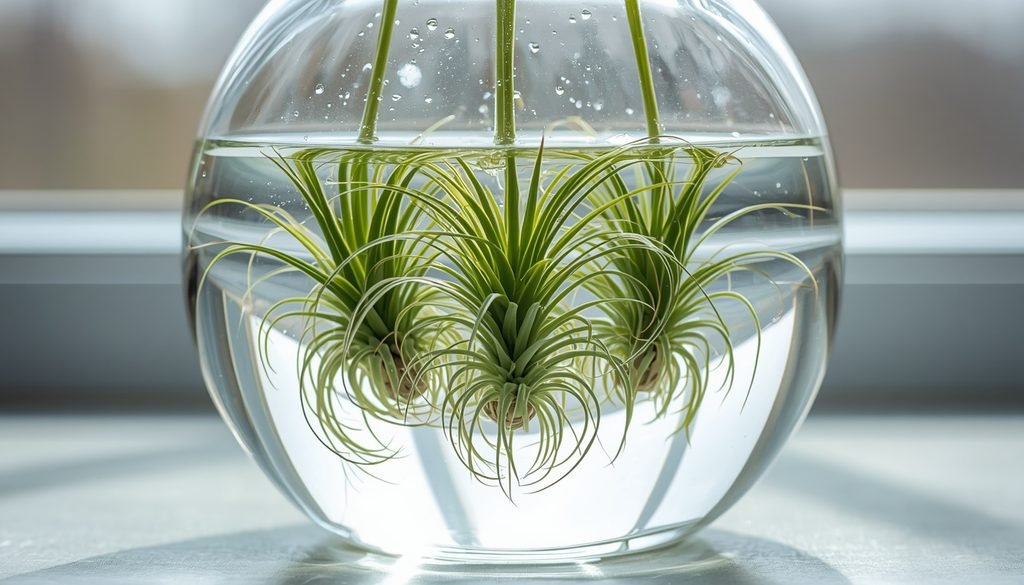
Why enclosed containers are risky. A closed glass globe traps humidity and slows drying. Penn State notes that plants look good enclosed in glass but must dry fully first. Open globes with a wide mouth are a much safer option than sealed terrariums.
Do you need a fan? Usually not. Gentle airflow is enough. Practical ways to get it:
- Keep plants on open shelves rather than in closed cabinets
- Place them in a room where air moves naturally, such as near a slightly open window
- Use a fan on low in a stuffy room, aimed nearby rather than directly at the plants
What gentle airflow means. You should feel a light, steady movement of air, not a blast. Strong dry drafts, and air from heating or cooling vents, dehydrate plants quickly.
Bathrooms. A bathroom can work if it has a bright window and good ventilation, because extra humidity is not harmful when the plant still gets light and can dry. A dark, windowless, poorly ventilated bathroom is a poor choice.
Temperature Requirements
Air plants generally prefer warm conditions and do well in the range most people find comfortable. Specialist growers commonly cite a range of about 50 to 90 degrees Fahrenheit (10 to 32 degrees Celsius), and the RHS lists warmth as one of the four main requirements. This range comes from grower guidance rather than a single university standard, so treat it as a practical guide.
- Protect from frost. Air plants are tropical and frost damages them.
- Avoid vents. Hot or cold drafts dry them quickly. Penn State specifically recommends avoiding air conditioners and heating vents.
- Watch hot glass. A plant pressed against sun heated glass can overheat.
Do Air Plants Need Fertilizer?
No, air plants can survive without fertilizer, but light feeding can support stronger growth and flowering. Clemson advises that fertilizing is not necessary, but plants are more vigorous with a light application once a month using a liquid fertilizer made for bromeliads, diluted to one quarter of the recommended rate. Other sources describe feeding monthly or a few times a year.
Feeding matters less if you use rainwater or pond water that carries some nutrients. It matters more if you use filtered or purified water indoors.
How to Fertilize Air Plants
- Choose a bromeliad or air plant fertilizer, or a water soluble houseplant or orchid fertilizer.
- Dilute it to one quarter of the label strength.
- Add it to the soaking water and soak as usual for 20 to 30 minutes.
- Drain and dry the plant fully.
Common mistake: using full strength fertilizer. Because leaves absorb what they touch, strong solutions can burn plants. When in doubt, dilute further or feed less often.
Can Air Plants Live Outdoors?
Yes, in the right conditions. Specialist growers note that air plants can live outdoors year round in frost free or nearly frost free climates. In cooler climates they can spend summer outdoors and come back inside before frost. The RHS notes that summer outdoor placement in the United Kingdom offers brighter conditions, rainfall, and higher humidity.
Outdoor conditions to aim for:
- Bright shade or filtered sun, not hot direct midday sun
- Shelter from strong wind, which can dry plants too quickly
- A position where rain can drain out of the crown rather than pool
Plants outdoors in humid climates may need little extra watering. In dry weather, water as you would indoors.
How to Care for Air Plants in Summer
In summer, air plants usually dry faster and need more frequent watering, but they also need more protection from hot sun.
- Water more often in hot, dry weather, checking leaf feel
- Move plants out of intense midday sun, especially behind glass
- Keep them out of heat trapping containers
- Watch for pale, dry, or crisp leaves, which suggest too much sun or too little water
How to Care for Air Plants in Winter
In winter, air plants usually need less frequent watering and more light. Lower temperatures, weaker light, and slower growth mean plants take longer to dry and use less water. This is a general horticultural principle rather than a fixed rule.
- Water less often, and dry for longer if the room is cool
- Move plants closer to a bright window, but keep them away from cold glass and frost
- Avoid heaters and vents, which can dry the air and the plant
- Water earlier in the day so plants dry before evening
If the soil remains wet for too long without proper drainage, the roots can quickly suffocate and decay, similar to how to identify and fix snake plant root rot before it destroys the entire plant.
How to Display and Mount Air Plants
Air plants can be displayed on almost any surface that dries quickly and is easy to water. Cornell Cooperative Extension notes that air plants can be attached to bark or cork with wire or glue, or displayed in dishes of pebbles.
Good options include:
- Driftwood, cork, or bark
- Open wire holders and wooden stands
- Shallow dishes with pebbles, as long as no water pools around the plant
- Open, wide mouthed glass globes
Options to be cautious with:
- Closed glass terrariums, which trap moisture
- Materials that stay wet, such as damp moss packed around the base
- Copper, which some growers avoid because it may harm plants (a common grower caution, not confirmed by the sources cited here)
Can you glue an air plant? Yes. Use a small amount of nontoxic, flexible adhesive at the base of the plant, keeping it away from the center of the crown, and allow it to set before watering. Wiring is a good alternative if you want to avoid glue. Choose an adhesive labeled safe for plants. This is a general practical recommendation.
How to Water Mounted or Glued Air Plants
Mounted plants can be soaked, rinsed, or misted, depending on the mount. If the mount can tolerate water, such as cork or driftwood, soak the whole piece for 20 to 30 minutes, then let it drain and dry. If the mount cannot be soaked, mist thoroughly to runoff, and tilt the piece so water leaves the crown. Homestead and Chill notes that misting is often the most realistic method for mounted plants, and that inverting may not be possible.
After watering, make sure the plant is not sitting with its crown facing up and holding water. Tilt or reposition the mount so water drains, and check the base of the plant after a few hours.
How to Tell If an Air Plant Is Healthy
A healthy air plant typically shows:
- Firm, stiff leaves that spring back when bent gently
- A consistent color for its species, whether green or silvery
- Slow, steady new growth from the center
- Roots that are dry and wiry, if present
- Leaves that stay attached to the plant
Some outer leaves dying and browning at the base over time is normal as the plant grows.
Signs of Dehydration
A dehydrated plant looks dry and shrunken, but its structure remains firm. Clemson lists leaf curling or rolling, a dull color, and brown tips as signs of too little water.
- Leaves curl inward or roll along their length
- Leaves look wrinkled or dull
- Brown, dry leaf tips
- The plant feels light and papery
Signs of Rot
Rot looks wet, soft, and dark, and it starts at the base or center.
- The center turns black, brown, or dark and mushy
- Leaves pull out easily, often with soft or slimy tissue at the base
- The plant feels heavy, soft, or squishy
- A sour or musty smell
- Leaves fall away from the plant
Rot progresses inward from the base, so early action matters.
Dehydration Versus Rot
| Feature | Dehydration 🍂 | Rot 🚨 |
|---|---|---|
| Feel | Dry, light, papery | Soft, heavy, squishy |
| Color | Dull, brown tips, curling | Black or dark brown center |
| Leaf behavior | Leaves curl or roll but stay attached | Leaves pull out easily or fall apart |
| Smell | None | Sour or musty |
| Where it starts | Leaf tips and edges | Base and center |
| Usual cause | Too little water, dry air, too much sun | Trapped water, poor airflow |
| Outlook | Often recovers | Recovers only if caught early and the growing point is intact |
If your plant outgrows its container or suffers from waterlogged soil, follow our step-by-step guide on how to repot a plant to give the roots fresh, well-draining soil.
Troubleshooting by Symptom
Brown tips
- Likely causes: Too little water, dry air, hard water, or a hot draft.
- How to check: Feel the leaves for softness or curling. Look for white residue.
- What to do: Soak more thoroughly, adjust frequency, and switch to filtered or rainwater if residue appears. Trim only the brown tip at an angle if you like.
- When to stop: If the brown spreads inward or the leaf feels soft rather than dry, treat it as rot.
Brown leaves
- Likely causes: Long term dehydration, too much direct sun, or natural aging of outer leaves.
- How to check: Compare dry, crisp leaves with the firm center.
- What to do: Remove fully dead outer leaves, water more thoroughly, and move to filtered light.
- When to stop: If the center is also brown and soft, switch to the rot section.
Black center
- Likely causes: Rot from water sitting in the crown, poor airflow, or a wet container.
- How to check: Gently tug a center leaf. If it comes out with dark, mushy tissue, rot is present.
- What to do: Remove rotten leaves, drain and dry completely, increase airflow, and cut back on watering.
- When to stop: If the growing point is fully black and soft, recovery is unlikely.
Soft or mushy leaves
- Likely causes: Rot, or extended time standing wet.
- How to check: Squeeze the base gently and smell it.
- What to do: Remove damaged leaves and dry in strong airflow.
- When to stop: If most of the plant is soft, stop watering attempts and consider saving healthy pups.
Curled leaves
- Likely causes: Thirst, dry air, or hot drafts.
- How to check: Feel for dryness and lightness.
- What to do: Soak, then review the schedule.
- When to stop: If leaves stay curled after several proper soaks and the plant is turning brown and crisp, it may be at the end of its life.
Shriveled appearance
- Likely causes: Dehydration, or a long gap between waterings.
- How to check: Compare firmness of the center with the outer leaves.
- What to do: Soak for longer and increase frequency gradually.
- When to stop: If it stays shrunken with dry brown leaves after several soaks, the plant may be beyond recovery.
Pale leaves
- Likely causes: Too much sun, low nutrition, or natural color changes before flowering (some species blush).
- How to check: Compare new growth with old growth and check the sun exposure.
- What to do: Move to filtered light and adjust watering. Consider light feeding.
- When to stop: If leaves are bleached, dry, and spreading, reduce sun immediately.
Dry leaves
- Likely causes: Not enough water, low humidity, or drafts.
- How to check: Feel for lightness and stiffness.
- What to do: Soak and then observe the plant for a week.
- When to stop: If the plant remains dry and brittle after repeated soaks, it may be dead.
Leaves falling off
- Likely causes: Rot at the base, or old outer leaves dying naturally.
- How to check: Pull a leaf gently. Check for soft base tissue.
- What to do: Treat rot if present. If the leaves are old and dry, simply remove them.
- When to stop: If the plant is separating from the base and mushy, it is collapsing.
Bad smell
- Likely causes: Rot, or stagnant water in a container.
- How to check: Smell the base and check the container.
- What to do: Empty containers, remove rotten tissue, and dry in strong airflow.
- When to stop: If the smell persists with soft tissue, the rot is likely advanced.
Plant separating or collapsing
- Likely causes: Advanced rot, or a parent plant declining after flowering while pups grow.
- How to check: Look for pups at the base, and check whether the separating tissue is mushy or dry.
- What to do: If pups are present, keep them. If rot is the cause, remove dead tissue.
- When to stop: If nothing firm or green remains, discard the plant.
No growth
- Likely causes: Low light, infrequent watering, cool temperatures, or naturally slow growth.
- How to check: Review the light, water quality, and season.
- What to do: Improve light first, then watering, then light feeding. Be patient, because air plants are slow growing.
- When to stop: No action needed if the plant is otherwise firm and healthy.
No flowers
- Likely causes: Immaturity, low light, or variation between plants.
- How to check: Consider plant age and light level.
- What to do: Keep light and watering steady and feed lightly.
- When to stop: Flowering cannot be forced, and each plant flowers only once.
How to Revive a Dehydrated Air Plant
Soak the plant, drain it well, and dry it in good airflow, then watch how it responds over the following days.
- Soak the plant in room temperature filtered or rainwater for 20 to 30 minutes. For severely dry plants, growers commonly use a longer soak of several hours. The extension sources cited here do not give a specific duration, so treat this as general grower practice.
- Shake the plant and drain it upside down.
- Dry it fully in bright, airy conditions.
- Return to a regular routine, with more frequent watering until leaves feel firm again.
Signs of recovery: leaves become firmer, uncurl slightly, and regain color over days to weeks.
Common mistake: soaking a rotting plant for hours because it looks dry. Check the base for softness first.
How to Save an Air Plant From Rot
Remove the rotted parts, dry the plant completely, and change what caused the moisture problem. Success depends on how far the rot has gone. If the growing center and base are still firm, recovery is possible.
- Gently pull away leaves that come out easily with dark, mushy tissue.
- Trim away soft, damaged tissue with clean scissors, leaving any firm tissue.
- Shake the plant and let it dry completely in strong, gentle airflow.
- Stop soaking for several days. Mist lightly only if leaves start to dry and curl.
- Fix the cause: improve airflow, move out of closed containers, and lengthen the time between waterings.
- Resume soaking with shorter soaks, and always drain and dry fully.
If pups are present, they may survive even if the parent does not. Remove healthy pups that have reached at least one third the size of the parent.
Air Plant Flowering
Air plants flower once in their lifetime, and the timing depends on species, age, and conditions. University of Vermont Extension notes that air plants flower only once, and that pups appear during or soon after flowering. Flowers come in colors such as coral, pink, and purple, and bloom periods range from a few days to several months depending on the species. Air Plant Supply Co notes that plants are most likely to bloom between mid winter and mid summer, but this varies.
Some species blush red or pink before flowering. Steady light, regular watering, and light feeding support flowering, but they cannot force it. Keep water off the flower itself.
What Happens After an Air Plant Flowers?
After flowering, the plant slowly declines while producing pups, but the plant line can continue for years. The parent leaves fade as the pups mature. This is normal and not a sign that you have done something wrong.
Keep watering and feeding as usual. Remove dead flower stalks and dead leaves once dry. Let the pups grow, and decide whether to leave them attached to form a clump or separate them.
Air Plant Pups and Propagation
Pups are small offsets that grow from the base of a mature plant, and they are the main way home growers propagate air plants. They have their own center, which sets them apart from ordinary leaves.
Pups can be removed once they reach at least a third of the parent plant’s size, using a gentle twist and tug. To separate them, hold the parent and the pup at the base and gently twist in a downward motion. You can also leave pups attached to build a clump, which many growers find looks fuller. Care for separated pups the same way as adult plants, and be patient, because they grow slowly.
How Long Do Air Plants Live?
Many air plants live for several years, and clumps can continue for much longer through pups. Specialist growers describe air plants as tropical plants that usually live for several years. Because each plant flowers only once and then produces pups, the original plant eventually declines, but its offspring can keep the clump going.
Lifespan depends on species, light, water quality, and how well the plant dries. A published average lifespan for all species does not exist, so treat any single number with caution.
Common Air Plant Care Mistakes
- Misting only. In dry air, misting rarely hydrates the whole plant.
- Not drying fully. Water left in the crown encourages rot.
- Closed containers. Sealed globes trap humidity and slow drying.
- Standing water. Plants left in shells or dishes can rot.
- Watering on a fixed schedule. Season and room conditions change the need.
- Too little light. Weak light slows growth and drying.
- Hot direct sun through glass. It can dry or scorch plants.
- Full strength fertilizer. Dilute to one quarter strength.
- Wet flowers. Blooms can rot if kept wet.
- Ignoring early signs. Rot is easier to save if caught early.
Beginner Air Plant Care Routine
Use this as a starting routine and adjust for your home.
Every few days: Take a quick look at color, leaf firmness, and the center of the plant.
Watering day (about once a week, more often in hot, dry rooms): Soak or rinse thoroughly with room temperature filtered or rainwater. Shake and drain upside down.
After watering: Place plants in bright, airy conditions and check that they are dry within about four hours.
Weekly: Inspect leaves and growth, remove dry outer leaves, and check that nothing is sitting in standing water.
Monthly: Review light, airflow, water quality, and feeding. Add a quarter strength bromeliad fertilizer to one soak if you choose to feed.
Seasonally: Water less in cool, dim months, and watch for scorching and faster drying in summer.
If your plant curls or turns dull, water more. If it feels soft or heavy at the base, water less and improve airflow.
Frequently Asked Questions
How do you care for an air plant indoors?
Give it bright, filtered light, soak or rinse it about once or twice a week, then shake it out and let it dry within about four hours in moving air. Keep it away from vents and closed containers, and adjust the routine for your room, the season, and the plant’s leaf feel.
What is the lifespan of an air plant?
Many air plants live for several years. Each plant flowers once, then slowly declines while producing pups, and those pups can continue the clump for much longer. Lifespan varies with species, light, water quality, and how well the plant dries, so no single number applies to every plant.
Where is the best place to keep air plants?
Choose a spot near a bright window with gentle airflow, out of hot midday sun and away from heating or cooling vents. A sheer curtain in a south facing window, or a bright east or west facing shelf, works well. Avoid dark corners and sealed containers.
Do air plants need water?
Yes. Air plants absorb water through their leaves, so they need regular watering even though they do not grow in soil. They can survive dry periods, but they grow poorly and eventually decline without water. A soak or rinse followed by complete drying is the most reliable method.
How often should you water an air plant?
Once a week is a common starting point, and Clemson University advises weekly watering. In hot, dry rooms, twice a week or supplementary misting may be needed. In cool, humid, or dim conditions, less frequent watering may be enough. Use leaf firmness and drying time to adjust.
Can you overwater an air plant?
Yes, although the real problem is usually water that stays trapped, not the amount of water. A plant that is soaked and then dries well in good airflow is unlikely to rot. Soaking followed by poor drying, or standing water in a container, causes rot in the crown.
Can air plants live in direct sunlight?
Some tolerate brief gentle sun, but hot direct sun, especially through glass, can dry or scorch leaves. Bright, filtered light is safer for most plants. If a plant must sit in strong sun, water it more often and watch for pale or crisp leaves.
Can air plants live in a bathroom?
Yes, if the bathroom has bright light and good ventilation. Extra humidity is not a problem when the plant can still dry, but a dark, windowless, poorly ventilated bathroom is a poor choice. After showers, make sure moisture does not linger around the plant.
Why is my air plant turning brown?
Brown tips usually suggest too little water, dry air, drafts, or water quality problems. Fully brown, crisp leaves can mean long term dehydration or too much sun. If brown areas are soft and dark at the base, suspect rot, and check for mushy tissue.
How do you revive a dying air plant?
First decide whether it is dehydrated or rotting. For dehydration, soak it, drain it, dry it in good airflow, and increase watering slowly. For rot, remove mushy leaves, dry it completely, and fix the airflow or watering habits. Recovery is unlikely if the growing center is black and soft.
Do air plants need fertilizer?
Not to survive, but light feeding can support growth and flowering. Clemson University suggests a bromeliad fertilizer once a month at one quarter of the label strength, added to soaking water. Feeding matters more if you use filtered or purified water, and less if you use rainwater.
Do air plants die after flowering?
The flowering plant slowly declines after it blooms, but it usually produces pups first. Those pups can grow into new plants or form a clump. So the individual plant does age, but the clump can live on. Keep caring for the plant normally after flowering.
Conclusion
Learning how to care for air plants is mostly about balance. Bright, filtered light supports growth, a thorough soak or rinse supplies water, and fast drying in moving air protects against rot. The exact schedule depends on your room, the season, and the species, so watch leaf firmness, color, and drying time rather than relying on one fixed rule.
If a problem appears, work out whether it is dehydration or rot before changing anything. Dehydration is usually fixable with a soak. Rot needs airflow, drier habits, and quick removal of damaged tissue. For broader plant habits, see the indoor plant care guide on PlantySolve.
Once your indoor greenery stabilizes and produces healthy new offshoots, you can easily expand your collection or share babies with friends learn how to propagate a spider plant for effortless plant multiplication.